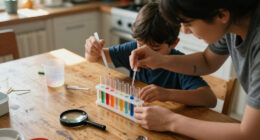

Use this guide to choose an educational science kit that fits a child’s age, interests, and experience, then prepare it and try an activity together. It is written for parents, caregivers, and teachers without a science background. Allow about 30-60 minutes to compare kits and prepare; the activity itself may take a few minutes or several sessions, depending on the project.

Get school and study supplies delivered free — and shop member deals
- Fast, free delivery on millions of items
- Access to Prime Big Deal Days deals on October 6–7
- Prime Video, Amazon Music and more included
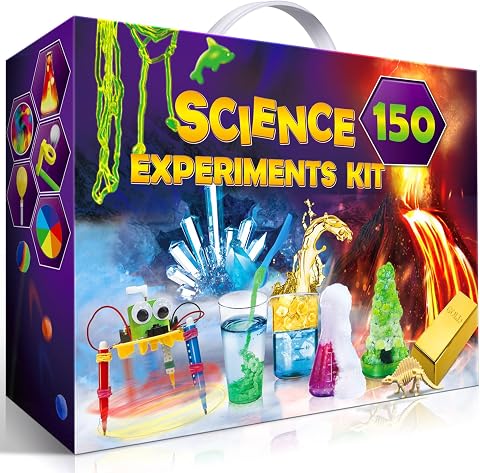
UNGLINGA 150-Experiment Science Kit for Kids
- ✔ Recommended age: 8 years and up
- ✔ Experiment count: 150
- ✔ Topics: Chemistry, physics, earth science, surface tension, and more

National Geographic Science Magic Kit for Kids, 100+ Experiments
- ✔ Brand: Blue Marble
- ✔ Model number: NGMEGAMAGIC
- ✔ Age range: 8 years and up

Kids’ Handheld Digital Microscope, 200x–1000x Magnification
- ✔ Recommended age: 5–13 years
- ✔ Optical magnification: 200x–1000x
- ✔ Digital zoom: 1x–4x
Success means the kit is age-appropriate, has the listed materials or clearly identifies what you must supply, includes understandable instructions, and lets the child safely make observations or test an idea—not just assemble a display.
Difficulty: Beginner | Time: 30-60 minutes to choose and set up; activity time varies by kit
What You’ll Need
Tools & Materials:
- A short list of the child’s age, interests, and any relevant allergies or sensitivities
- Access to product packaging or a retailer listing that shows age guidance, contents, safety notes, and activity instructions
- A clear, washable work surface
- Household materials listed by the kit, such as water, paper towels, or measuring spoons
Knowledge:
- No science expertise is needed
- Be ready to supervise according to the age guidance and activity instructions
- Know whether the child has allergies, sensory needs, or difficulty using small parts
Set aside enough time to read the kit’s instructions before opening sealed materials. Do not assume every item shown in a product photo is included. Follow the package age rating and safety warnings, and keep small parts and chemicals away from young children, pets, and food-preparation areas.
UNGLINGA 150-Experiment Science Kit for Kids
When we want one kit to move between different kinds of science, UNGLINGA’s 150-experiment lineup has the strongest case. Its activities touch chemistry, physics, earth science, surface tension, and other topics, so a child who loses interest in repeating one type of demonstration has more directions to explore. The illustrated, step-by-step manual is an important part of that appeal: it gives children a sequence to follow rather than leaving them to figure out every activity from a collection of tools.Compared with National Geographic’s magic-focused set, UNGLINGA is less dependent on a single theme and is better suited to families seeking topic variety. It also offers a wider stated activity count than the 20 experiments for which the National Geographic kit supplies materials. But the number alone does not mean every activity is ready immediately: some experiments call for common household items. We should expect occasional preparation, and the kit may work best when an adult helps gather materials or read directions for children who are still developing independent skills.At ages 8 and up, it shares an intended starting age with the National Geographic kit, but its educational identity is broader than magic tricks. The microscope is a better match for a child who wants to inspect tiny details repeatedly; UNGLINGA instead favors switching between guided activities and science themes. That makes it our most flexible general-purpose pick, while leaving families to accept some variation in setup and supplies.
Pros:
- 150 hands-on activities cover several areas of science
- Illustrated manual provides step-by-step guidance
- Includes tools and child-friendly experiment materials
- Some experiments use familiar household items
Cons:
- Some activities require household materials beyond the kit
- The large activity range may involve more sorting and preparation than a single-purpose tool
Best for: Children aged 8 and up who want a varied menu of guided activities across multiple science topics, with an adult available to help source household materials when needed.
Not ideal for: Families looking for a self-contained kit that never needs extra supplies, or children whose main interest is observing specimens through a screen.
Bottom line: We recommend UNGLINGA as the broadest starting point for families who want one kit to explore several science topics through guided experiments.
“We recommend UNGLINGA as the broadest starting point for families who want one kit to explore several science topics through guided experiments.”
National Geographic Science Magic Kit for Kids, 100+ Experiments
This kit gives science a clear hook: children perform magic-style tricks, then connect the effects to hands-on activities. For a child who is more readily drawn to a surprising demonstration than a conventional lesson, that framing can help make experimentation feel inviting. The booklet also broadens the activity menu, listing more than 85 additional magic experiments alongside the materials supplied for 20 experiments.That materials-versus-ideas distinction is worth noticing. Compared with UNGLINGA, which is presented as a 150-experiment kit across multiple science fields, National Geographic is more tightly themed and includes materials for fewer activities. The bonus booklet adds plenty of prompts, but it should not be read as a claim that all 100-plus ideas have their materials included. Its advantage is engagement through performance and surprise, not the same breadth of ready-to-use equipment as a large general experiment set.The listed age is 8 years and up, matching UNGLINGA, and some activities may need adult supervision. The microscope takes a different route altogether, turning observation into the main activity rather than using tricks as a starting point. We would choose this kit for children who enjoy showing a result to family or friends, and skip it if the priority is a broad, explicitly multi-topic program or independent specimen study.
Pros:
- Pairs magic tricks with hands-on science activities
- Includes materials for 20 experiments
- Bonus booklet contains more than 85 additional experiment ideas
- Designed for children aged 8 and up
Cons:
- The extra booklet ideas are not all represented as having included materials
- Some activities may require adult supervision
- Its magic-centered theme is narrower than UNGLINGA’s multi-topic activity range
Best for: Children aged 8 and up who enjoy magic tricks, demonstrations, and explaining surprising effects, especially when an adult can help supervise activities.
Not ideal for: Families seeking materials for every idea in the booklet, a wide-ranging curriculum-style activity set, or a dedicated observation tool.
Bottom line: We would choose this kit over a broad experiment collection when the child’s strongest motivation is performing and unpacking science-themed tricks.
“We would choose this kit over a broad experiment collection when the child’s strongest motivation is performing and unpacking science-themed tricks.”
Kids’ Handheld Digital Microscope, 200x–1000x Magnification
Rather than offering a sequence of unrelated experiments, this handheld digital microscope lets children return to the same question: what does this specimen look like up close? Its built-in 2.4-inch color screen makes viewing direct, and adjustable LED lighting helps illuminate samples. Twelve prepared slides provide a starting point, while the portable design and rechargeable battery let children move beyond a fixed desktop setup.Compared with UNGLINGA and the National Geographic kit, this is the most focused educational option. It supports observation and image capture, not a broad menu of chemistry, physics, or magic activities. That focus can be a strength for a child who likes examining details, but it means families should not choose it expecting the same variety as a 150-experiment kit. The stated magnification range is 200x–1000x, with manual focus; those figures describe the viewing capability, but children may still need practice adjusting focus and lighting to get a useful view.The product is listed for ages 5–13, giving it a younger recommended starting age than either experiment kit. Practical limits matter: battery life is up to two hours, video recording requires a separately sold microSD card, and the product notes that device photos cannot be downloaded. We therefore rank it below the multi-topic kits for general breadth, while recommending it to families who specifically want a screen-based tool for looking at prepared or found specimens.
Pros:
- 200x–1000x optical magnification with manual focus
- Built-in color screen, 4K camera, and photo capture
- Twelve prepared slides and adjustable LED lighting are included
- Portable design with a rechargeable battery and listed two-year warranty
Cons:
- Video recording requires a separately sold microSD card
- Battery life is listed as up to two hours
- Product notes that photos cannot be downloaded from the device
Best for: Children aged 5–13 who are curious about specimens and want a portable, screen-based way to view them, with prepared slides included for getting started.
Not ideal for: Families wanting a varied set of guided experiments, video recording without buying a separate microSD card, or a way to download captured photos.
Bottom line: We recommend this microscope when close-up observation is the goal, but choose one of the experiment kits for a wider range of hands-on activities.
“We recommend this microscope when close-up observation is the goal, but choose one of the experiment kits for a wider range of hands-on activities.”
As an Amazon Associate we earn from qualifying purchases.
Before You Start
Decide what you want the child to do: explore a topic, practice a skill, or complete a particular experiment. A kit is a better fit when its activities match the child’s interests and ability to follow directions. Check the entire activity description, not only the age label. Some kits require close adult help, extra household supplies, batteries, or multiple days for a result to appear.
Read warnings and ingredient or materials information before buying or using a kit. Avoid any activity that conflicts with the child’s known allergies, the home’s safety needs, or your ability to supervise. Never let a child taste kit materials, and do not mix substances beyond the instructions.
Step-by-Step Instructions
Step 1: Set the child’s age, interests, and support needs
Write down the child’s age and two or three subjects they enjoy, such as animals, space, building, plants, rocks, or simple machines. Note whether the child can read directions independently, handle small components, and wait for results that take time. Use those answers to narrow the kit type and the level of adult help you can provide.
Tip: Choose for the child’s actual ability and attention span, not only the age printed on the box. A kit that is too advanced can turn an experiment into an adult-only task.
Check: You have a short list of topics and a realistic idea of how much guidance the child will need.
Step 2: Compare the activity and learning approach
Read the activity list and sample instructions on the package or product listing. Look for specific things the child will do: observe, predict, measure, build, compare, or record results. Prefer activities that invite the child to ask a question and notice what changes. Check whether the kit offers more than one activity or a way to repeat an experiment with a different variable.
Tip: A dramatic result can be fun, but it does not by itself make a kit educational. Look for clear directions and opportunities to make observations, rather than relying on claims such as “hours of fun.”
Check: You can describe at least one activity and what the child will learn or practice by doing it.
Step 3: Check age guidance, safety, and required supervision
Read the stated age range, warning labels, and any supervision instructions. Check for small parts, sharp tools, heat, electricity, powders, liquids, or other materials that call for extra care. Confirm that the child can use the kit with the level of supervision you can provide. If safety information is missing or unclear, ask the seller or manufacturer before purchase, or choose another kit.
Tip: An age label is guidance, not a substitute for checking the actual activity. An adult should handle any task the instructions reserve for adults.
Check: You understand the main hazards and know who will handle the parts or steps that need adult supervision.
Step 4: Verify the contents and extra supplies
Compare the listed kit contents with what each activity needs. Identify items that must be supplied separately, such as water, batteries, containers, or household tools. Check whether special components are reusable, consumable, or available as replacements. Add the required extras to your shopping list before starting so the child is not left waiting midway through an activity.
Tip: Do not treat “complete kit” as proof that every activity is ready to start. The contents list and instructions are the useful references.
Check: You have every required item or a clear plan to obtain it before the activity begins.
Step 5: Choose the kit that fits your budget and repeat use
Compare a few suitable options by activity quality, clarity of instructions, replacement supplies, and likely repeat use—not price alone. Check whether the kit supports several experiments or only one. Review the seller’s return policy and the manufacturer’s contact details in case parts are missing. Pick the kit that meets the child’s needs and your supervision and supply limits.
Tip: A lower-cost kit can be a good choice if its directions are clear and its activities suit the child. Avoid paying extra for materials the child is not ready to use.
Check: You can explain why the selected kit fits the child better than the alternatives you considered.
Step 6: Read the instructions and prepare the work area
Before involving the child, read the full instructions for the first activity, including cleanup and disposal directions. Gather the kit parts and required household supplies. Cover the work surface if the activity may spill, keep food and drinks away, and set out a container for used materials. Wash hands as directed and keep the kit’s packaging or instruction sheet nearby.
Tip: Do not open sealed materials or start mixing components until you have read the activity steps and safety notes.
Check: The activity can proceed without leaving the work area to search for a missing tool or instruction.
Step 7: Let the child take part in the experiment
Explain the activity’s safety rules in simple terms, then invite the child to read or listen to each instruction before acting. Ask what they think will happen, and let them perform the safe steps themselves. Follow quantities and order exactly; do not add materials or improvise with chemicals. Help with reading or handling tools without taking over the observation or decision-making.
Tip: If the result is unexpected, pause and compare what happened with the directions. Do not repeat a step or add more material unless the instructions say to.
Check: The child has safely completed the planned steps and can describe something they noticed.
Step 8: Record results and clean up as directed
Ask the child to draw, write, or explain what changed and whether the result matched their prediction. Use any worksheet supplied, or make a simple note of the question, what you did, and what you observed. Follow the kit’s cleanup and disposal instructions, return reusable parts to their storage, and wash hands and the work surface as directed.
Tip: An unexpected or unclear result is still a useful observation. Record what actually happened instead of changing the notes to match the expected result.
Check: The child can share an observation, materials are stored or disposed of properly, and the area is clean.
Common Mistakes to Avoid
- Choosing a kit because its box looks exciting without checking the activities. — Read the activity descriptions and sample directions first. Confirm that the child will do something hands-on and that you can explain the purpose of an activity in plain language.
- Starting before checking for separately supplied materials or adult-only steps. — Read the complete instructions before opening materials. Gather household supplies and assign adult-only tasks before inviting the child to begin.
- Letting the child skip a step, change quantities, or combine materials to get a faster result. — Follow the order and amounts in the directions. Explain that changing multiple things makes it difficult to tell what caused the result, and never mix materials beyond the instructions.
- Expecting the kit to produce a perfect result on the first attempt. — Treat the instructions as a method to test, not a promise that every result will look identical. Record what happened and check setup, timing, and measurements before trying again.
Troubleshooting
Problem: A listed part or required supply is missing.
Solution: Stop before starting that activity. Check the package contents and your setup list, then contact the seller or manufacturer about a missing kit component. Use a substitute only if the instructions or manufacturer confirm that it is suitable.
Problem: The activity produces no visible result or looks different from the instructions.
Solution: Check the quantities, order of steps, temperature or waiting time, and any preparation requirements. Confirm that the materials are within their stated use period if one is shown. Do not add more ingredients or repeat the activity with changes unless the instructions allow it.
Problem: The child finds the directions too difficult or loses interest.
Solution: Pause and restate one step at a time, demonstrate only the parts that need adult help, and let the child choose whether to continue. For future activities, select a simpler project with shorter steps and a result the child can observe directly.
Problem: A material spills, irritates skin, or gets into eyes.
Solution: Stop the activity and follow the kit’s first-aid and spill instructions. Get adult help immediately, rinse affected skin or eyes as directed by the product guidance, and contact local poison control or emergency services when the label or symptoms call for it. Do not resume until the area and materials are safe.
What Success Looks Like
The task is complete when you have selected a kit suited to the child’s age, interests, and support needs; checked its safety instructions and required supplies; and prepared a clean work area. During the activity, the child follows the directions with appropriate supervision and gets a chance to predict, observe, or record a result. Afterward, the child can describe at least one thing they noticed, and materials and waste are handled according to the instructions.
The result does not have to match a picture perfectly. A safe activity with a clearly recorded observation can succeed even when the experiment produces an unexpected outcome.
Next Steps
Store reusable parts, instructions, and worksheets together, and keep any restricted materials secured as directed. Note which activity the child enjoyed and whether the instructions matched their ability. Before starting another experiment, check its supplies and safety notes again. If the kit uses up a material, buy only a replacement listed or approved by its maker; do not substitute household chemicals on your own. Choose a follow-up kit or activity that builds on the child’s questions, such as measuring, observing, or testing one change at a time.
Frequently Asked Questions
What age science kit should I buy?
Start with the age guidance on the package, then check the actual reading level, parts, tools, and supervision demands. Choose a kit the child can participate in safely with the help available. When uncertain, contact the manufacturer or select a simpler kit.
Do I need a science background to help?
No. Read the instructions and safety notes in advance, help the child follow the steps, and ask what they predict and observe. You do not need to know the answer before the activity; focus on recording what happens accurately.
Are household substitutions safe if a kit item is missing?
Only substitute an item when the directions or manufacturer explicitly approve it. A material that appears similar may behave differently or create a hazard. Pause the activity and request the correct component if no approved substitute is listed.
What should I do if the experiment does not work?
Check the instructions, amounts, sequence, waiting time, and any stated conditions. Record the result, and repeat only if the directions permit it. Avoid adding extra ingredients or changing several steps at once.
How can I tell whether a kit is genuinely educational?
Look for clear explanations and activities where children observe, measure, build, compare, or test a question. Worksheets or facts can add value, but the child should have a meaningful role in carrying out an activity and describing what happened.
Fall Picks
fall essentials
As an affiliate, we earn on qualifying purchases.